WSL
WSL (WSL 2) – Windows Subsystem for Linux – is a compatibility layer for running Linux binary executables natively on Windows 10 and later. Currently, it supports several Linux distributions, such as Ubuntu, OpenSUSE, and SLES.
With WSL toolchain set up for your project, you can build using a toolchain from Linux, and run/debug on WSL, without leaving WebStorm running on your Windows machine.
Configure WSL
Download and install a WSL distribution (for instance, Ubuntu) from Microsoft Store on your Windows machine.
For this step, be sure to use at least Windows 10 or later with the latest “Fall Creators Update” (minimum version 1709, build 16299.15). See the official guide Install the Windows Subsystem for Linux for instructions.
To work with WSL 2, your Windows version should be 10 build 18917 or later. Follow these instructions to switch the distributive.
Run the Linux distribution.
Upon the first launch, the system may prompt you to enable the Windows optional feature. In this case, you need to do the following:
Open Windows PowerShell as Administrator and run
Enable-WindowsOptionalFeature -Online -FeatureName Microsoft-Windows-Subsystem-LinuxRestart your computer.
Install Node.js and npm
Inside the Linux (Ubuntu) installation, make sure nvm, Node,js, and npm are installed. For the detailed installation instructions, refer to Install Node.js on Windows Subsystem for Linux.
Open your command-line shell or the embedded Terminal (Alt+F12) .
Install
cURL:sudo apt-get install curlInstall
nvm:curl -o- https://raw.githubusercontent.com/nvm-sh/nvm/master/install.sh | bashInstall Node.js by running one of the following commands:
nvm install --ltsto install the stable Long Term Service Node.js versionnvm install nodeto install or the current release version
You can create a project and store it in the WSL environment, open one from the WSL file system, and develop your projects further in WSL.
Create a new project in the WSL file system
Install and run WebStorm locally on Windows as you normally would.
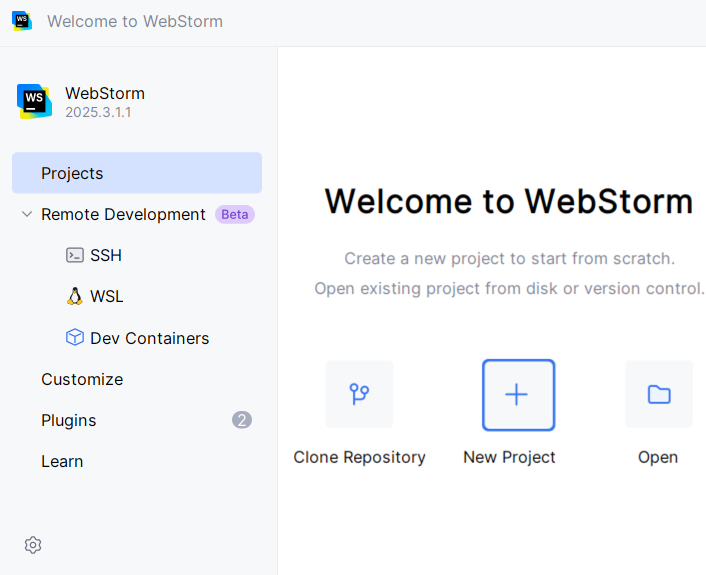
On the welcome screen, click New Project.
In the dialog that opens:
Select the project type from the list in the left pane.
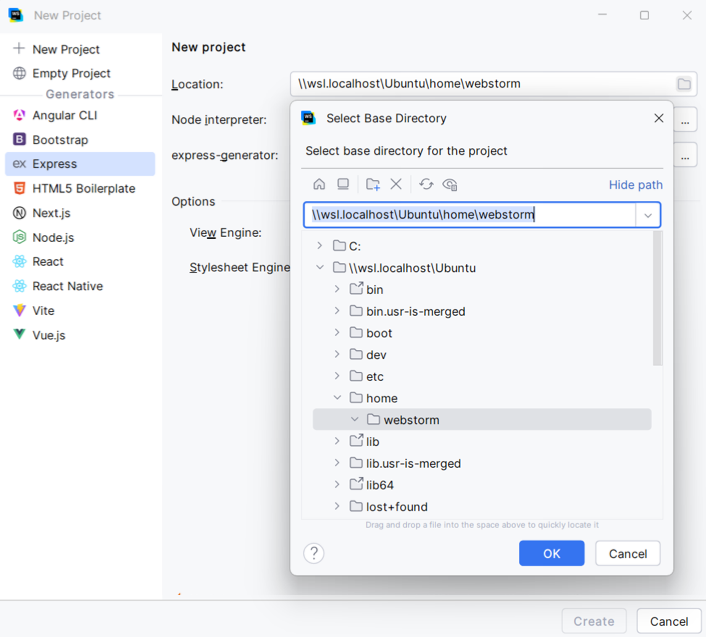
In the right pane, specify the project name and location. The project location for WSL will show the absolute path starting with \\wsl$ to the WSL file system.
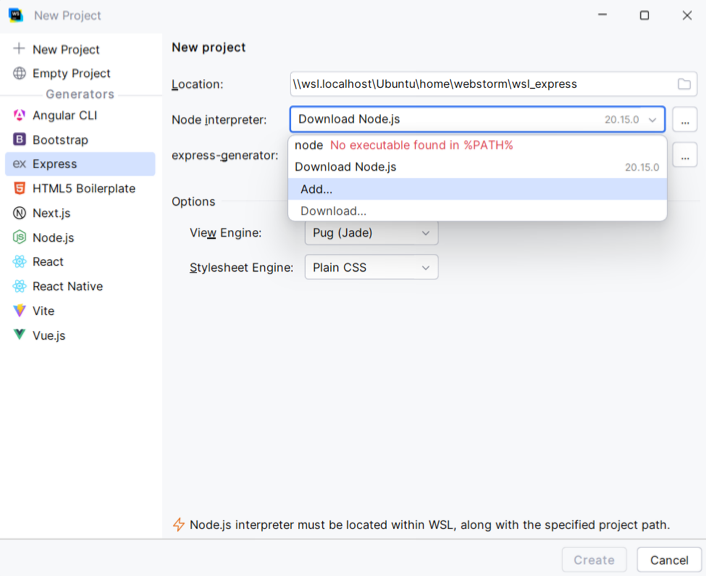
Most often, WebStorm asks you to specify the location of Node.js. Select Download from the list if you have no Node.js yet. Alternatively, select Add to configure a WSL Node.js interpreter.
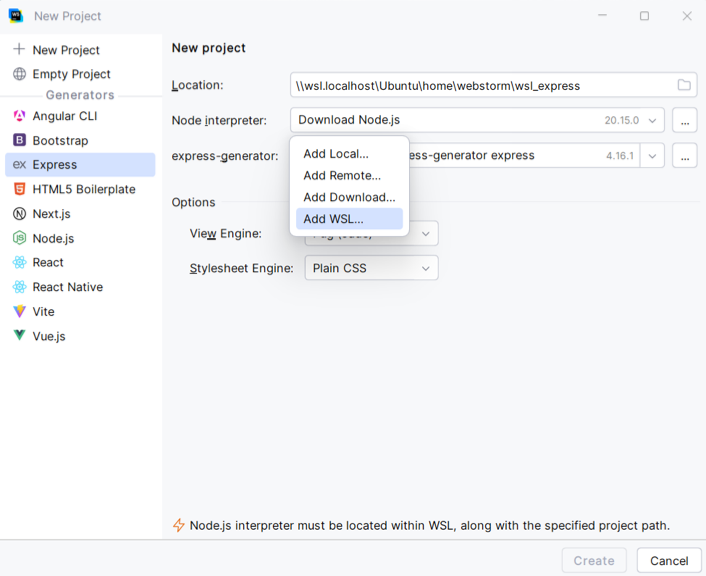
Then select Add WSL from the popup.
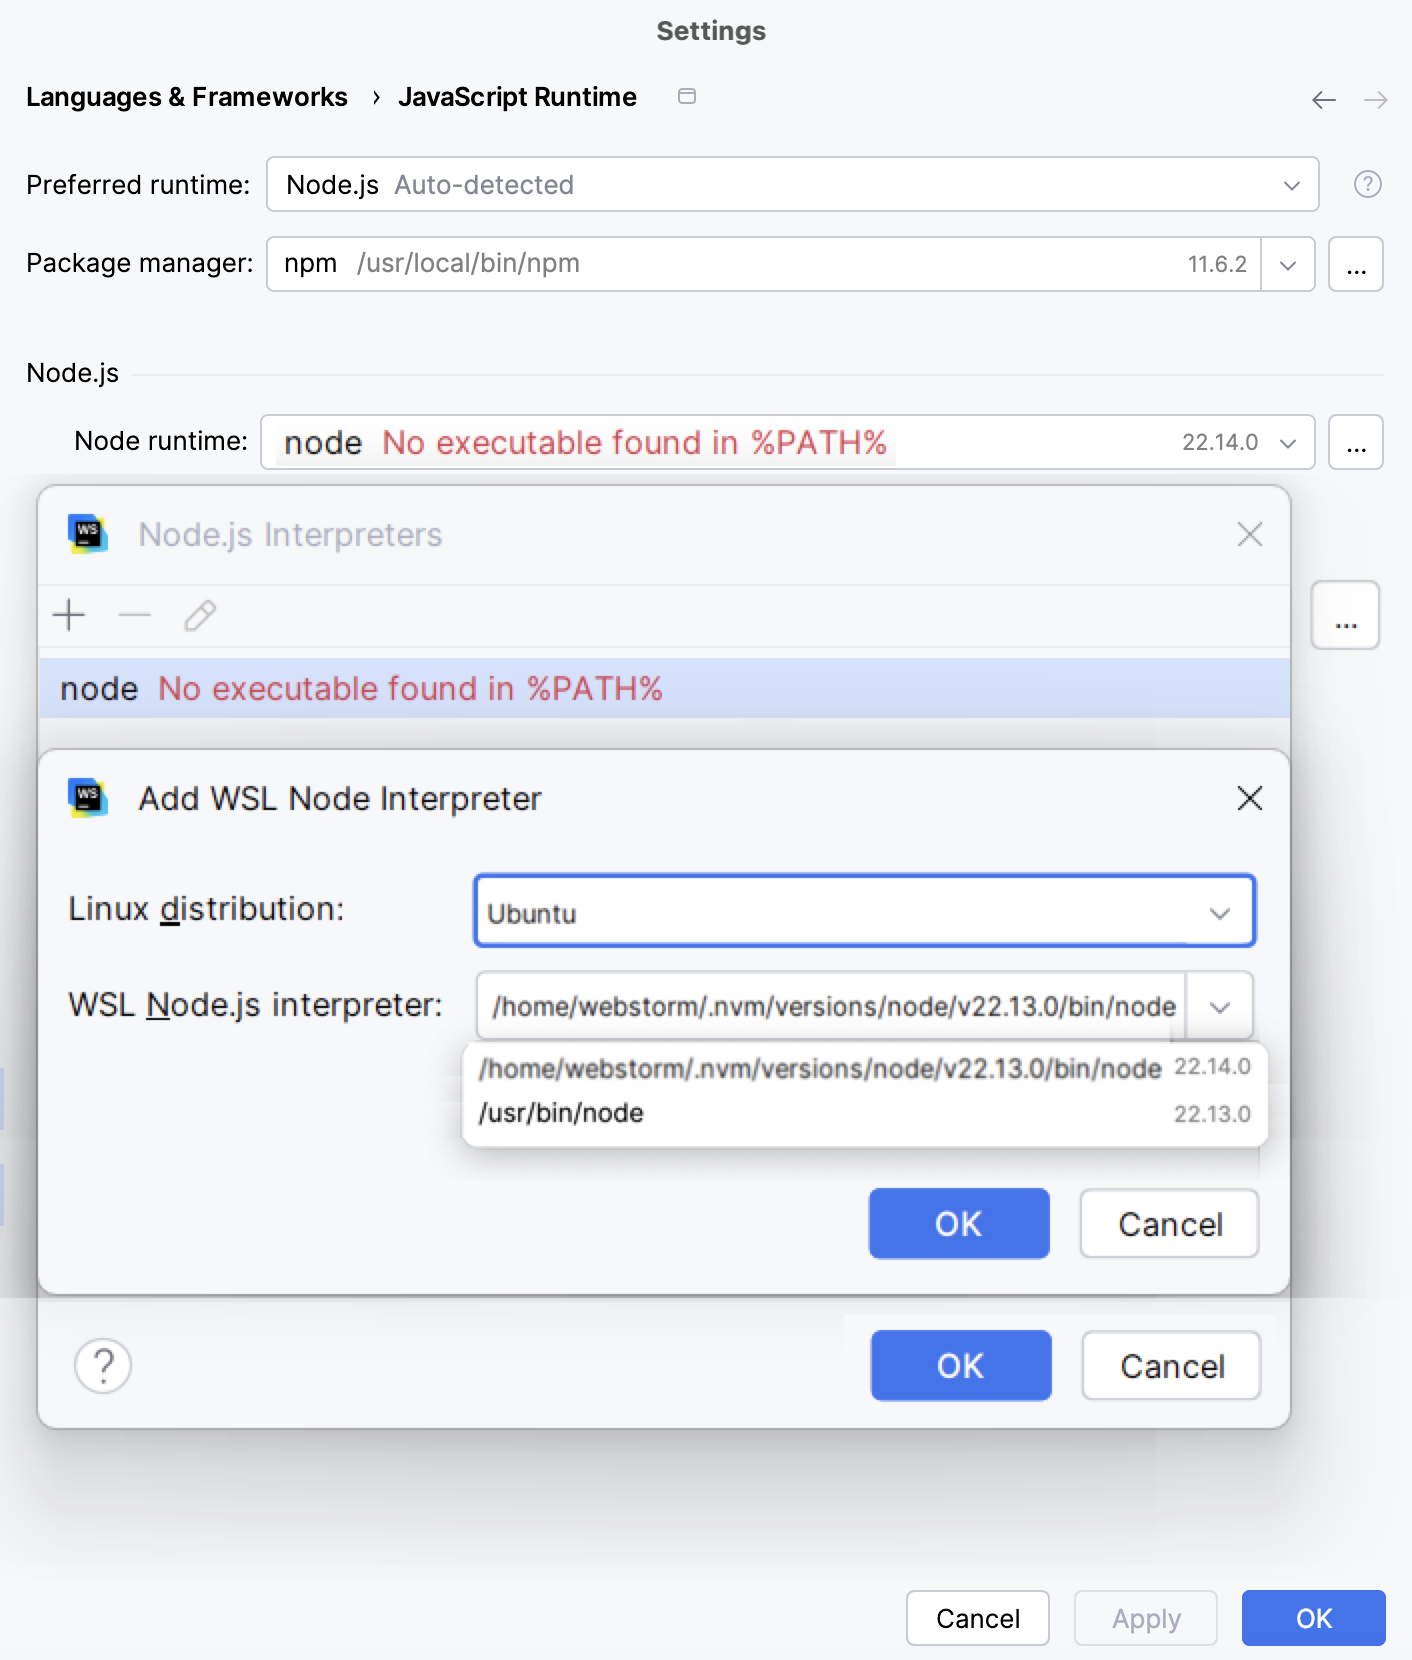
In the Add WSL Node Runtime dialog that opens, specify the currently used Linux distribution and the path to Node.js.
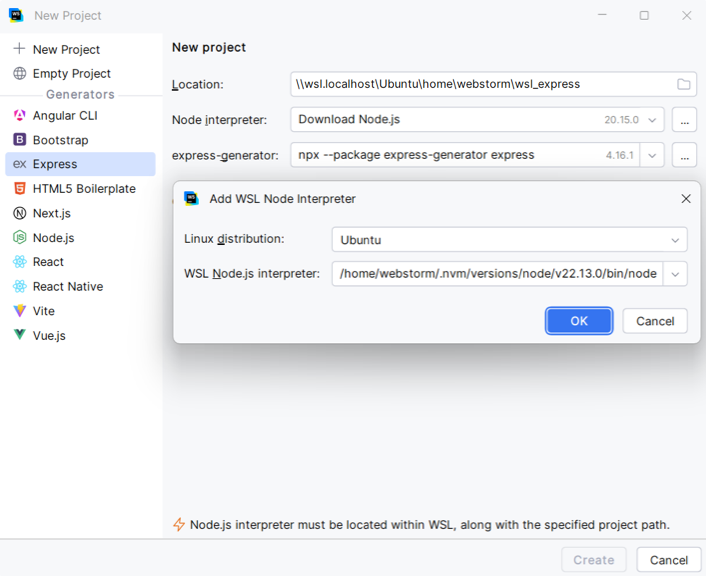
Fill in the other fields in the right pane. The set of the fields depends on the selected project type. See the corresponding articles under Other languages and frameworks for details.
Click Create.
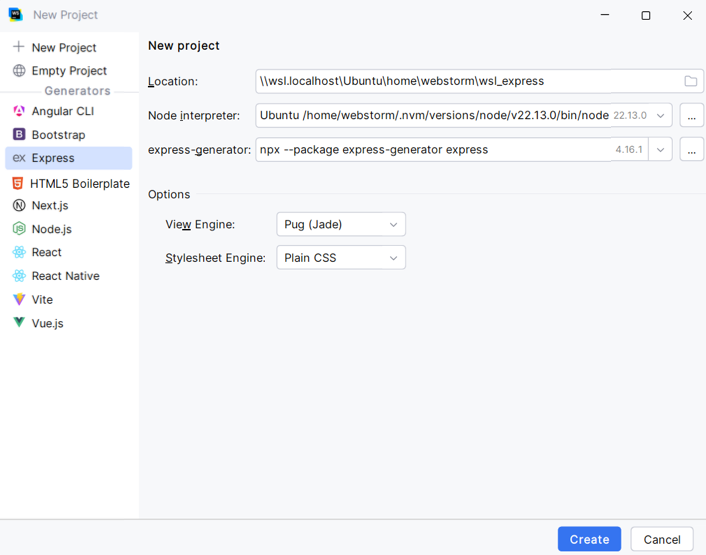
WebStorm creates a project located in WSL, and you can develop and build your project inside the WSL environment without leaving the IDE.
Open a project stored in the WSL file system
In WebStorm, you can directly open a project stored in the WSL file system and work with it like with any other project.
Click Open on the Welcome screen or select from the main menu.
In the Select Path dialog that opens, select the folder in the WSL file system that contains the project to open, or type the path to the project location manually.
The path syntax is
\\wsl.localhost\DistributionNamewhereDistributionNameis the name of your Linux distribution such as Ubuntu, Debian, Arch, and so on.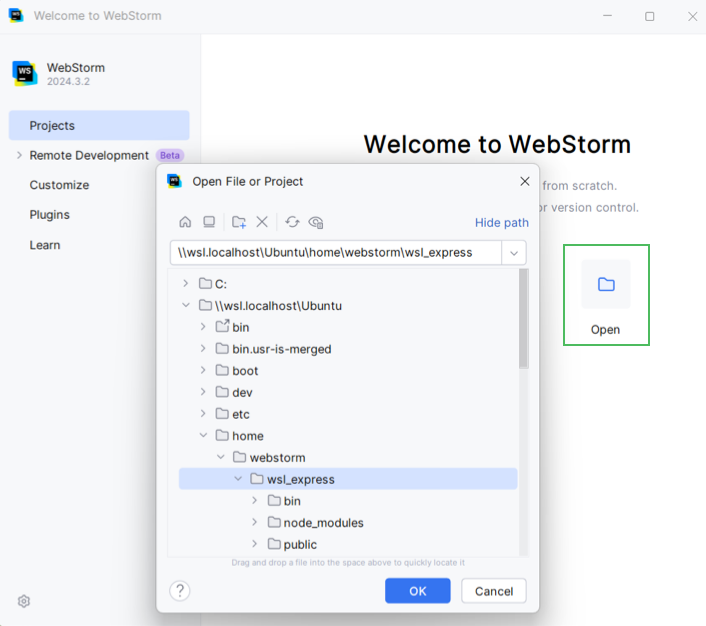
Configure the project location
You can ensure that any project you create or open uses the appropriate WSL location.
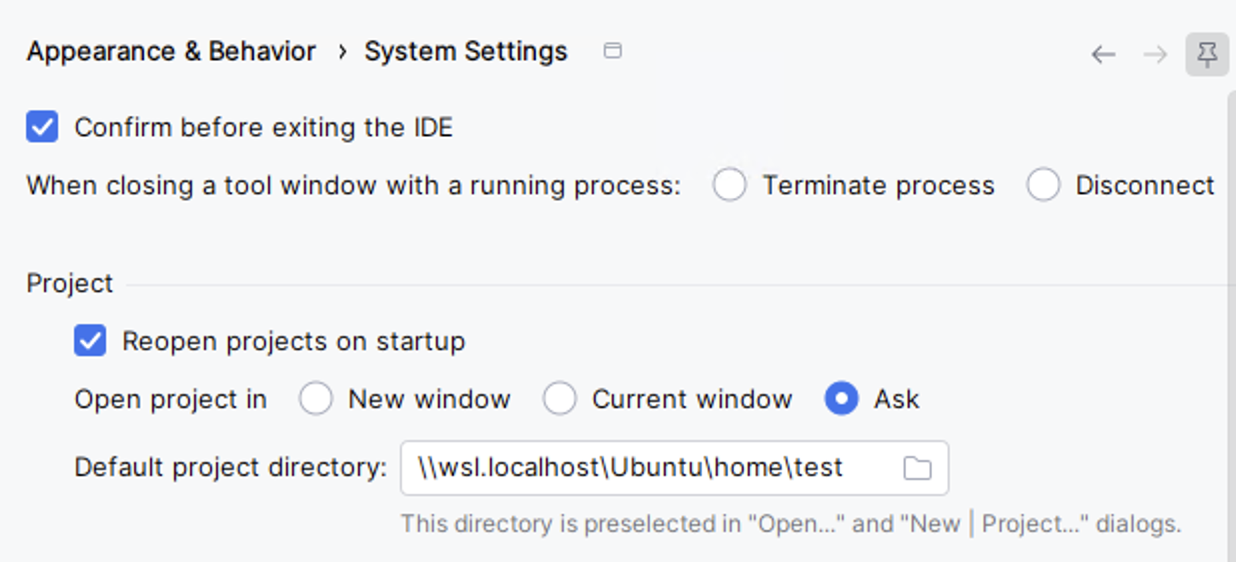
Configure a WSL-based Node.js runtime
You can set a Node.js installation as the default runtime for the current project, or you can configure and use this Node.js version in a Node.js Run/Debug configuration.
In the Settings dialog (Ctrl+Alt+S) , go to .
Click
 next to the Node runtime field, in the Node.js Runtimes dialog that opens, click
 , and then select Add WSL from the list.
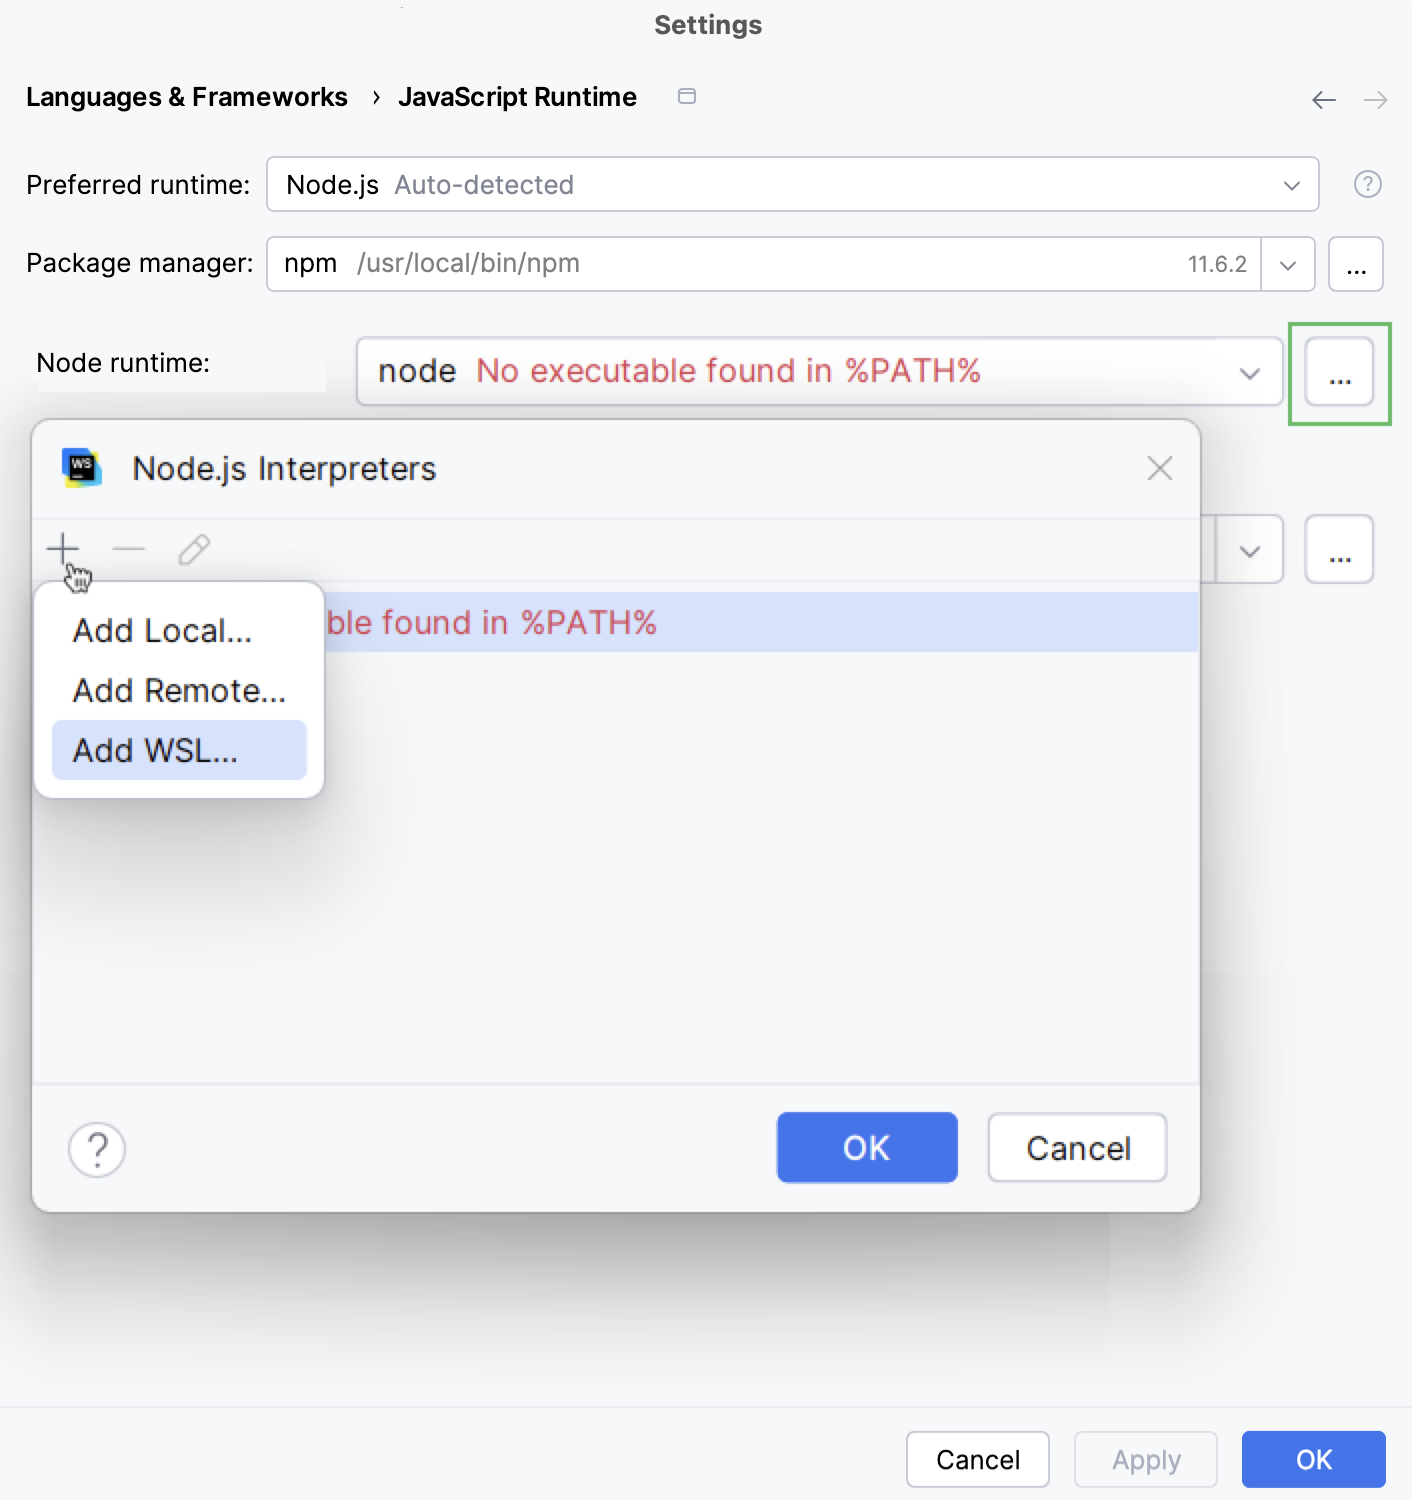
In the Add WSL Node Runtime dialog that opens, select the Linux distribution you’re using and specify the path to Node.js.
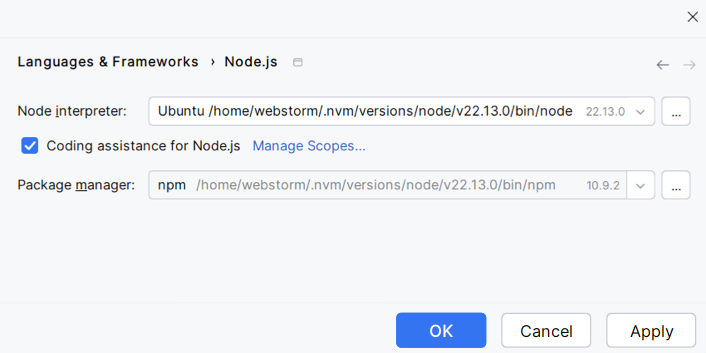
The configured Node.js installation is added to the list and is set as the default for the current project.
Run and debug your project
When you run or debug your application, it is run in WSL. If you open the run configuration, note that WebStorm refers to WSL as local machine.
Create a run/debug configuration of the appropriate type, depending on the type of your application. To do that, go to . Then in the Run/Debug Configurations dialog, click
on the toolbar and select the required run/debug configuration type. In the dialog that opens, fill in the fields as necessary or accept the predefined values.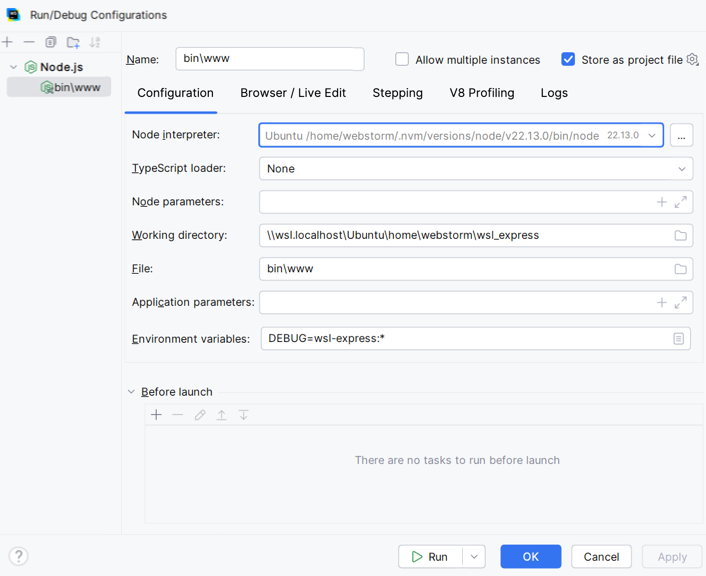
To run your application, from the Run widget select the newly created run/debug configuration, and click
 next to it.
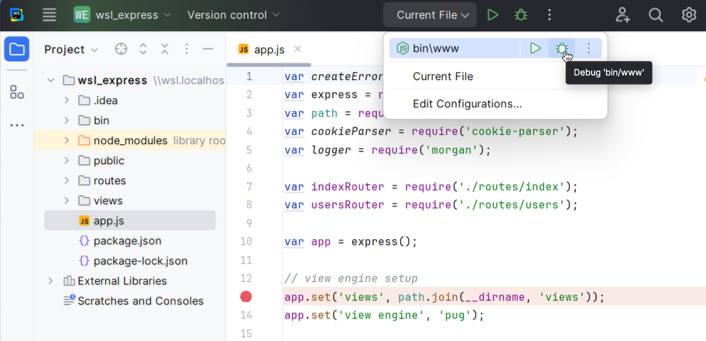
To debug your application, set the breakpoints where necessary, from the Run widget select the newly created run/debug configuration, and click
 next to it.
WSLg
WSLg lets you run Linux GUI applications and shows their output on the Windows desktop.
We do not recommend running WebStorm through WSLg. WebStorm already provides native WSL integration, which is the preferred approach.
Keep in mind the following:
WSLg has limitations related to rendering, popups, window management, input methods, and desktop integration.
We do not provide dedicated support, installation guidance, onboarding, or product-specific fixes for running WebStorm through WSLg.
To learn how to open a project, refer to Open a project stored in the WSL file system or if you want to create the new one, refer to Create a new project in the WSL file system.
Tips and tricks
Using WSL as part of your everyday development workflow involves several important choices that can affect performance, compatibility, and ease of use.
Choose the file system
When creating a project on Windows with WSL, the choice is essentially between storing the project on the Windows file system (for example, in C:\Users\...\project) and storing it inside the WSL/Linux file system (for example, in ~/projects/project). The best choice depends mainly on where your development tools and runtime execute.
Choose the Windows file system (C:\Users\me\project) when most of your development environment runs natively on Windows, that is, when you use:
Windows Node.js and npm/yarn/pnpm
Windows Git
Windows-based terminal
Windows Docker tooling that works with Windows paths
Other Windows applications that need frequent direct access to your project files
The main advantage is that Windows applications get normal, fast access to your project files.
The downside appears when you run Linux tools against those files from WSL. The files are exposed under paths such as /mnt/c/Users/me/projects/my-app. File operations across this Windows/Linux boundary can be slower, particularly for web projects that contain huge numbers of small files, such as node_modules. File watching can also be more troublesome.
Choose the WSL file system (/home/me/projects/my-app or simply ~/projects/my-app) when your application's runtime and development toolchain run primarily on WSL. For example:
Git on WSL
Linux shell scripts
Linux-based build tools
Docker with WSL integration
Linux-based test and development servers
The major advantage of this approach is that Linux tools access a native Linux file system. The major advantage of this approach is that Linux tools access a native Linux file system. Operations that involve thousands of files, for example, dependency installation, indexing, compilation, tests, and file watching, generally behave more naturally there.
It also makes your development environment closer to the Linux environments that are commonly used in Continuous Integration and production.
Choose how WebStorm accesses files
If your project files are stored on the WSL file system, you need to choose how WebStorm accesses those files and where its backend runs.
WebStorm is installed on Windows and accesses files on WSL.
This configuration makes most sense when desktop convenience matters more than having the entire development stack execute inside Linux.
The main advantage is that you retain a normal Windows desktop application: Windows shortcuts, window management, browser integration, credential stores, fonts, and other desktop integrations continue to behave naturally.
The disadvantage is that WebStorm and project are on opposite sides of the Windows/Linux boundary. Depending on the WebStorm architecture, operations such as indexing, file watching, Git operations, and resolving large dependency trees can involve cross-system file access.
WebStorm is installed on Windows and accesses files on WSL in the Remote Development mode.
For a strongly WSL-oriented web development workflow, storing the project on WSL and using WebStorm with a remote backend on WSL is generally the most architecturally consistent choice.
The main advantage is Linux-native development. This is particularly attractive for a WSL-centric workflow because the computationally intensive project operations happen inside WSL, close to the files. For example, the IDE backend can index ~/projects/my-app while while Node.js, npm, Git, TypeScript, ESLint, and other tools also execute on WSL.
You get two benefits at once: a native Windows UI and a Linux-native project environment. This becomes especially valuable for projects whose tooling assumes Linux semantics, uses Linux shell scripts, relies heavily on symlinks or permissions, or has a large node_modules tree.
The Linux version of WebStorm accesses files on WSL. The WebStorm GUI is displayed through WSLg.
Although this approach seems beneficial because everything runs in the same Linux environment, a Linux version of WebStorm running through WSL is still a Linux GUI application rather than a native Windows application. As a result, integration with Windows applications, browsers, credential managers, notifications, file dialogs, and similar desktop facilities may therefore be less seamless.
Address hot reload and other read/write issues
If you keep the project on the Windows file system but run the development server or tooling inside WSL, hot reload and some read/write operations can become less reliable, because Linux processes are watching files through the Windows-mounted path, typically:
It is strongly recommended that you avoid this cross-filesystem setup for build systems, node_modules, and Git-heavy workflows because of the extra Input/Output overhead.
For hot reload specifically, the usual workaround is to switch the file watcher from native events to polling, which means that the development server periodically checks files, for example, their modification timestamps, to see whether they have changed.
When Vite runs on WSL2 and files are edited by a Windows process, file watching may not work, and
usePolling: trueis the fallback. The trade-off is higher CPU usage.export default defineConfig({ server: { watch: { usePolling: true, }, }, })Use a polling-based watch configuration:
module.exports = { watchOptions: { poll: 1000, // Check for changes every second }, };Use polling with a default or a specific interval.
const wp = new Watchpack({ poll: true // Check for changes at a default interval });or:
const wp = new Watchpack({ poll: 1000 });- import chokidar from 'chokidar'; const watcher = chokidar.watch('.', { usePolling: true });
For other read/write problems, the important measures are to keep the environment as consistent as possible. If the project stays on C:\..., use /mnt/c/... from WSL, avoid mixing Windows and Linux versions of package managers against the same node_modules, and be careful with permissions, case sensitivity, symlinks, and executable bits. WSL maps Windows files through DrvFS, and Linux permissions on those files do not behave exactly like permissions on a native Linux filesystem; WSL can optionally store Linux permission metadata on Windows files.
Example: Run a Vite dev server with polling enabled
Create a Vite project on the Windows file system at C:\projects\my-app.
Make sure your project package.json contains a script to start the Vite development server:
{ "scripts": { "dev": "vite" } }Run the development server from WSL.
WSL sees the project as /mnt/c/projects/my-app.
In vite.config.ts, enable polling:
import { defineConfig } from 'vite' export default defineConfig({ server: { watch: { usePolling: true, }, }, })From a WSL terminal, navigate to the project and start Vite:
cd /mnt/c/projects/my-app npm install npm run devVite starts the development server, typically at
http://localhost:5173/Edit your application code, for example, src/App.tsx in WebStorm on Windows. Because polling is enabled in the configuration file (
usePolling: true), Vite that is running on WSL periodically checks the project files for changes instead of relying solely on file-system change events. When Vite detects a modification, it triggers HMR (Hot Module Replacement) or reloads the page as appropriate.