Review and commit changes
Air in IDEs helps you review the changes that an agent made and commit them. For example, during a code review, you can leave notes for the agent, which it uses to answer your questions or improve the code. When the changes are ready, you can ask an agent to write the commit message for you, or help you resolve merge conflicts if a version control operation leaves any.
Review changes with code notes
When you review the changes, you can ask the agent questions about them or request improvements by adding notes to the code snippets that you want explained or reworked.
To review the changes with code notes:
In a session with the agent, click
 Review Code.
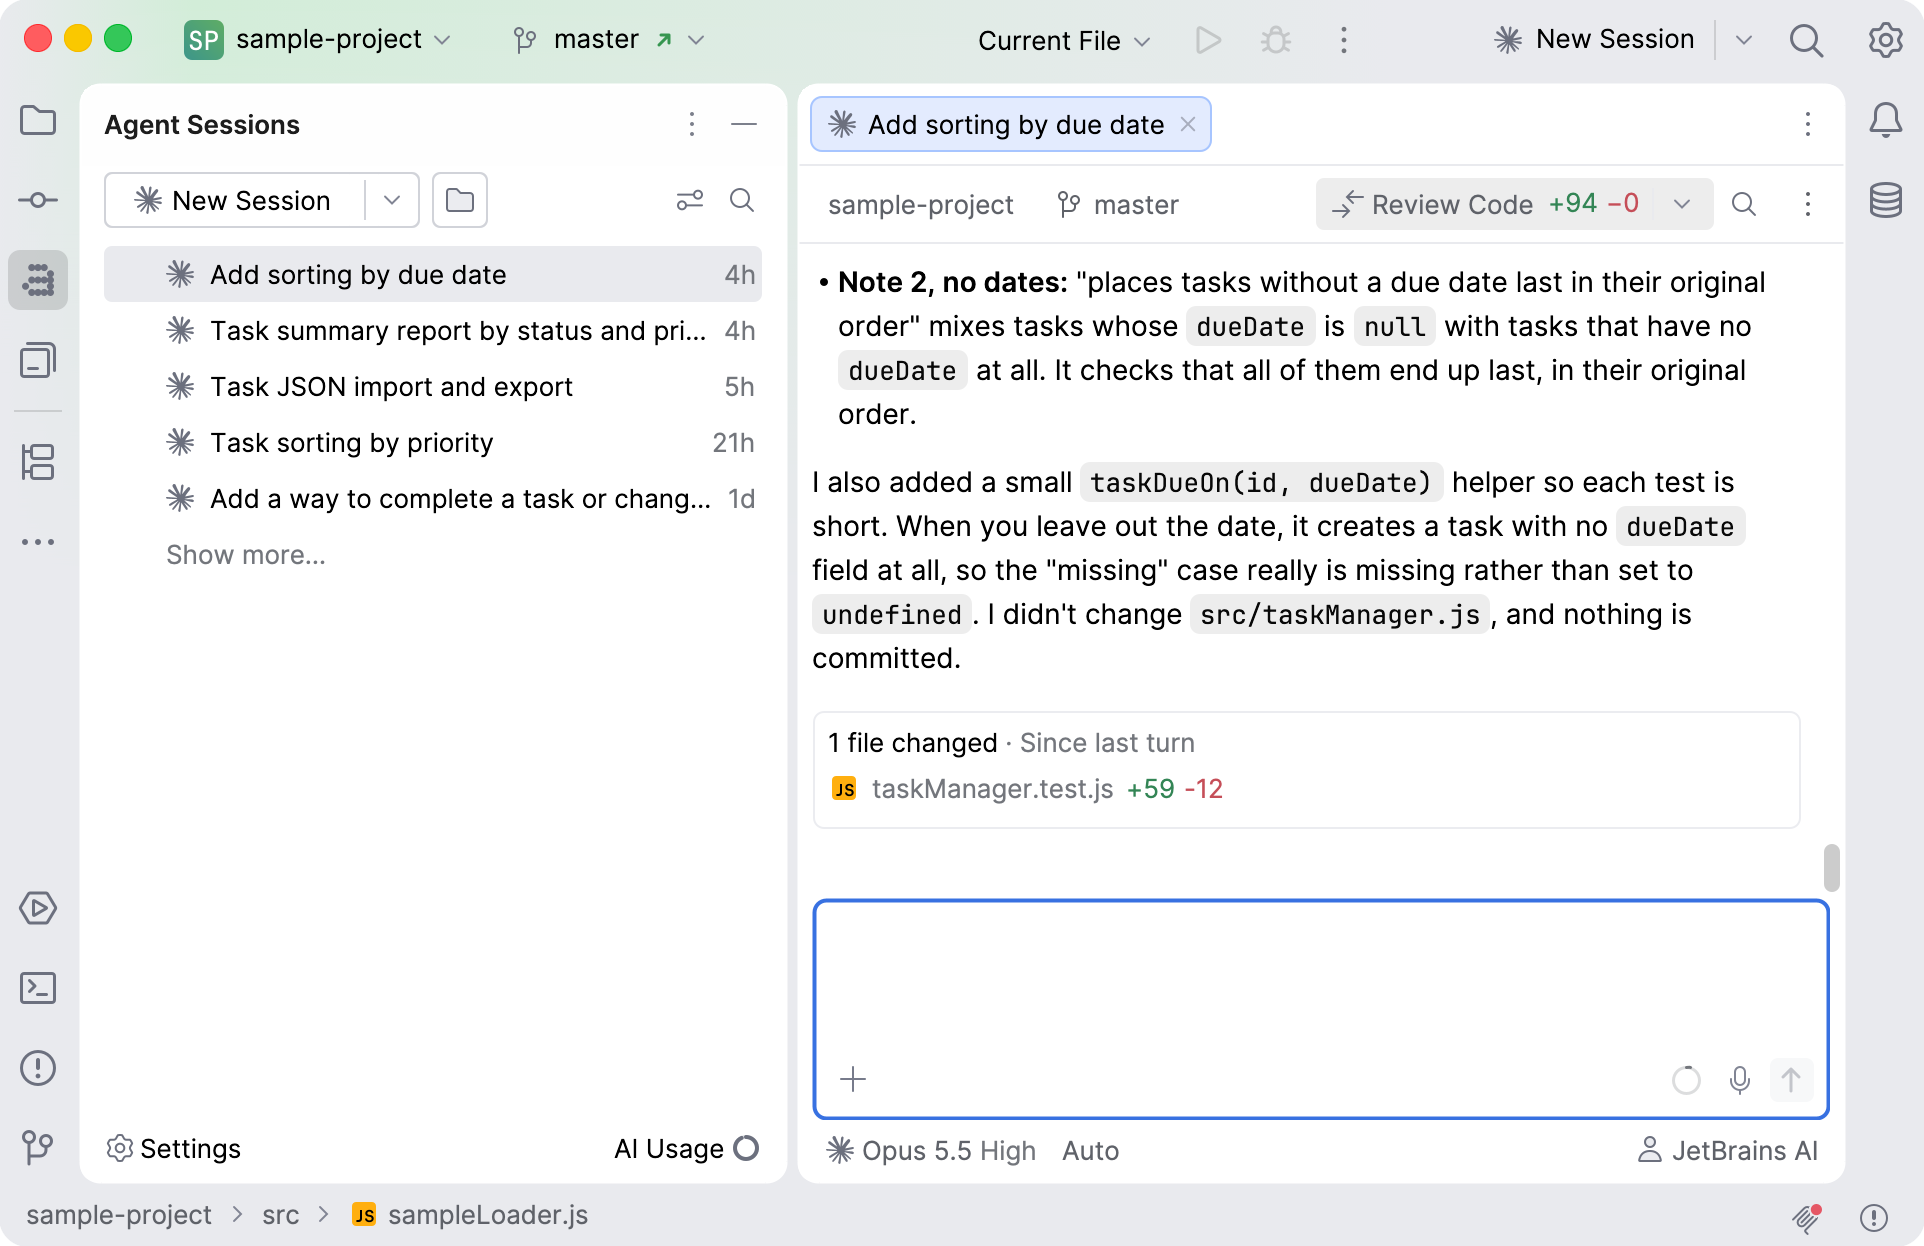
Select the scope of the review. When you hover over an item in the list, the range from the local changes down to that item is highlighted. Click the item to add the whole range to the review.
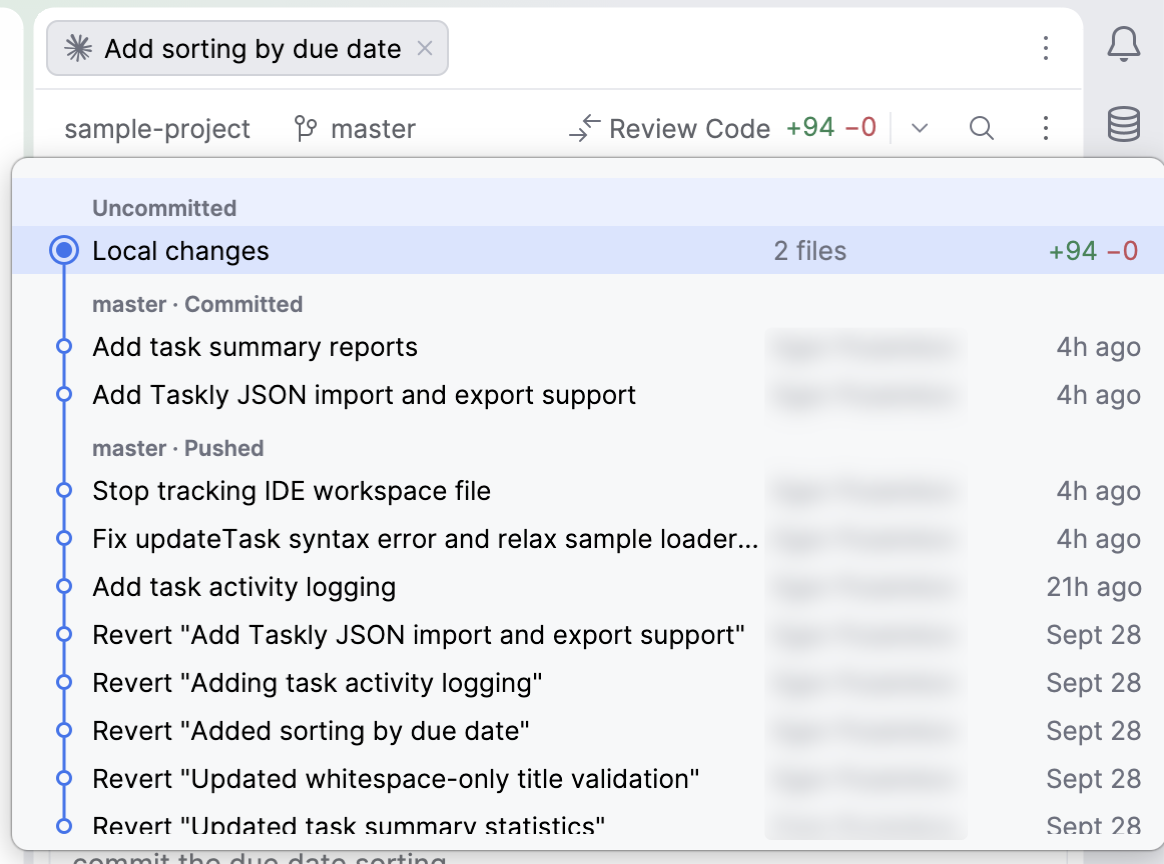
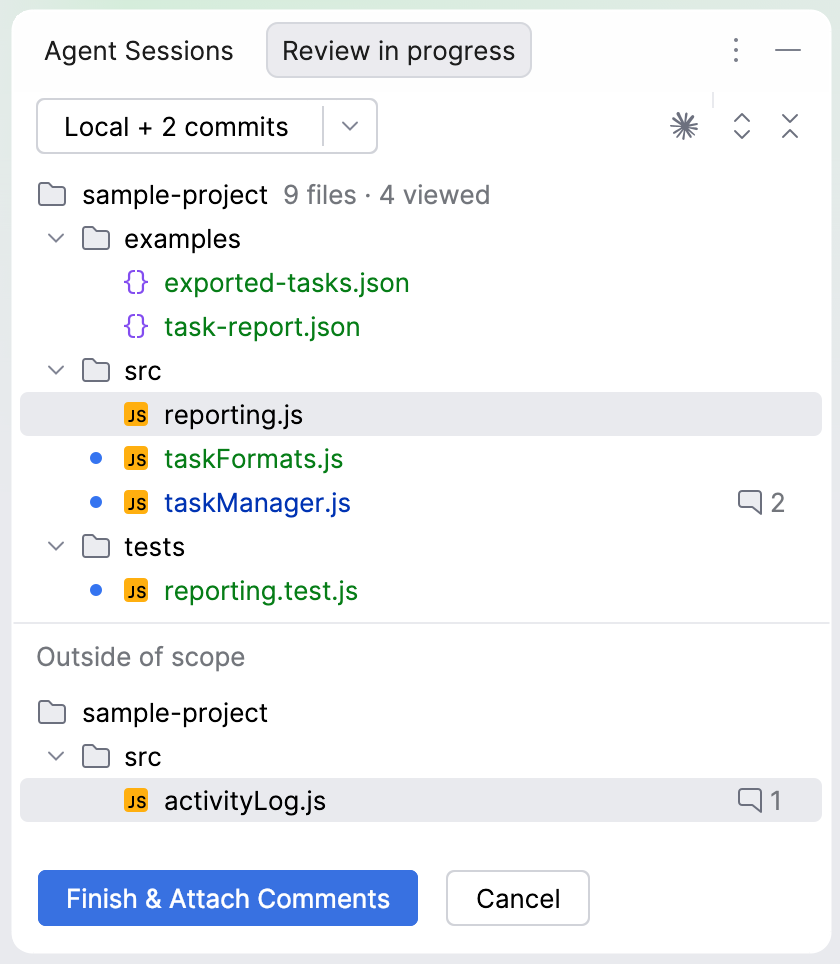
This starts the code review. The diffs for changed files open in the Code Review editor tab, and the Review in progress tab appears in the Agent Sessions tool window, listing all the files that were changed in the selected scope.
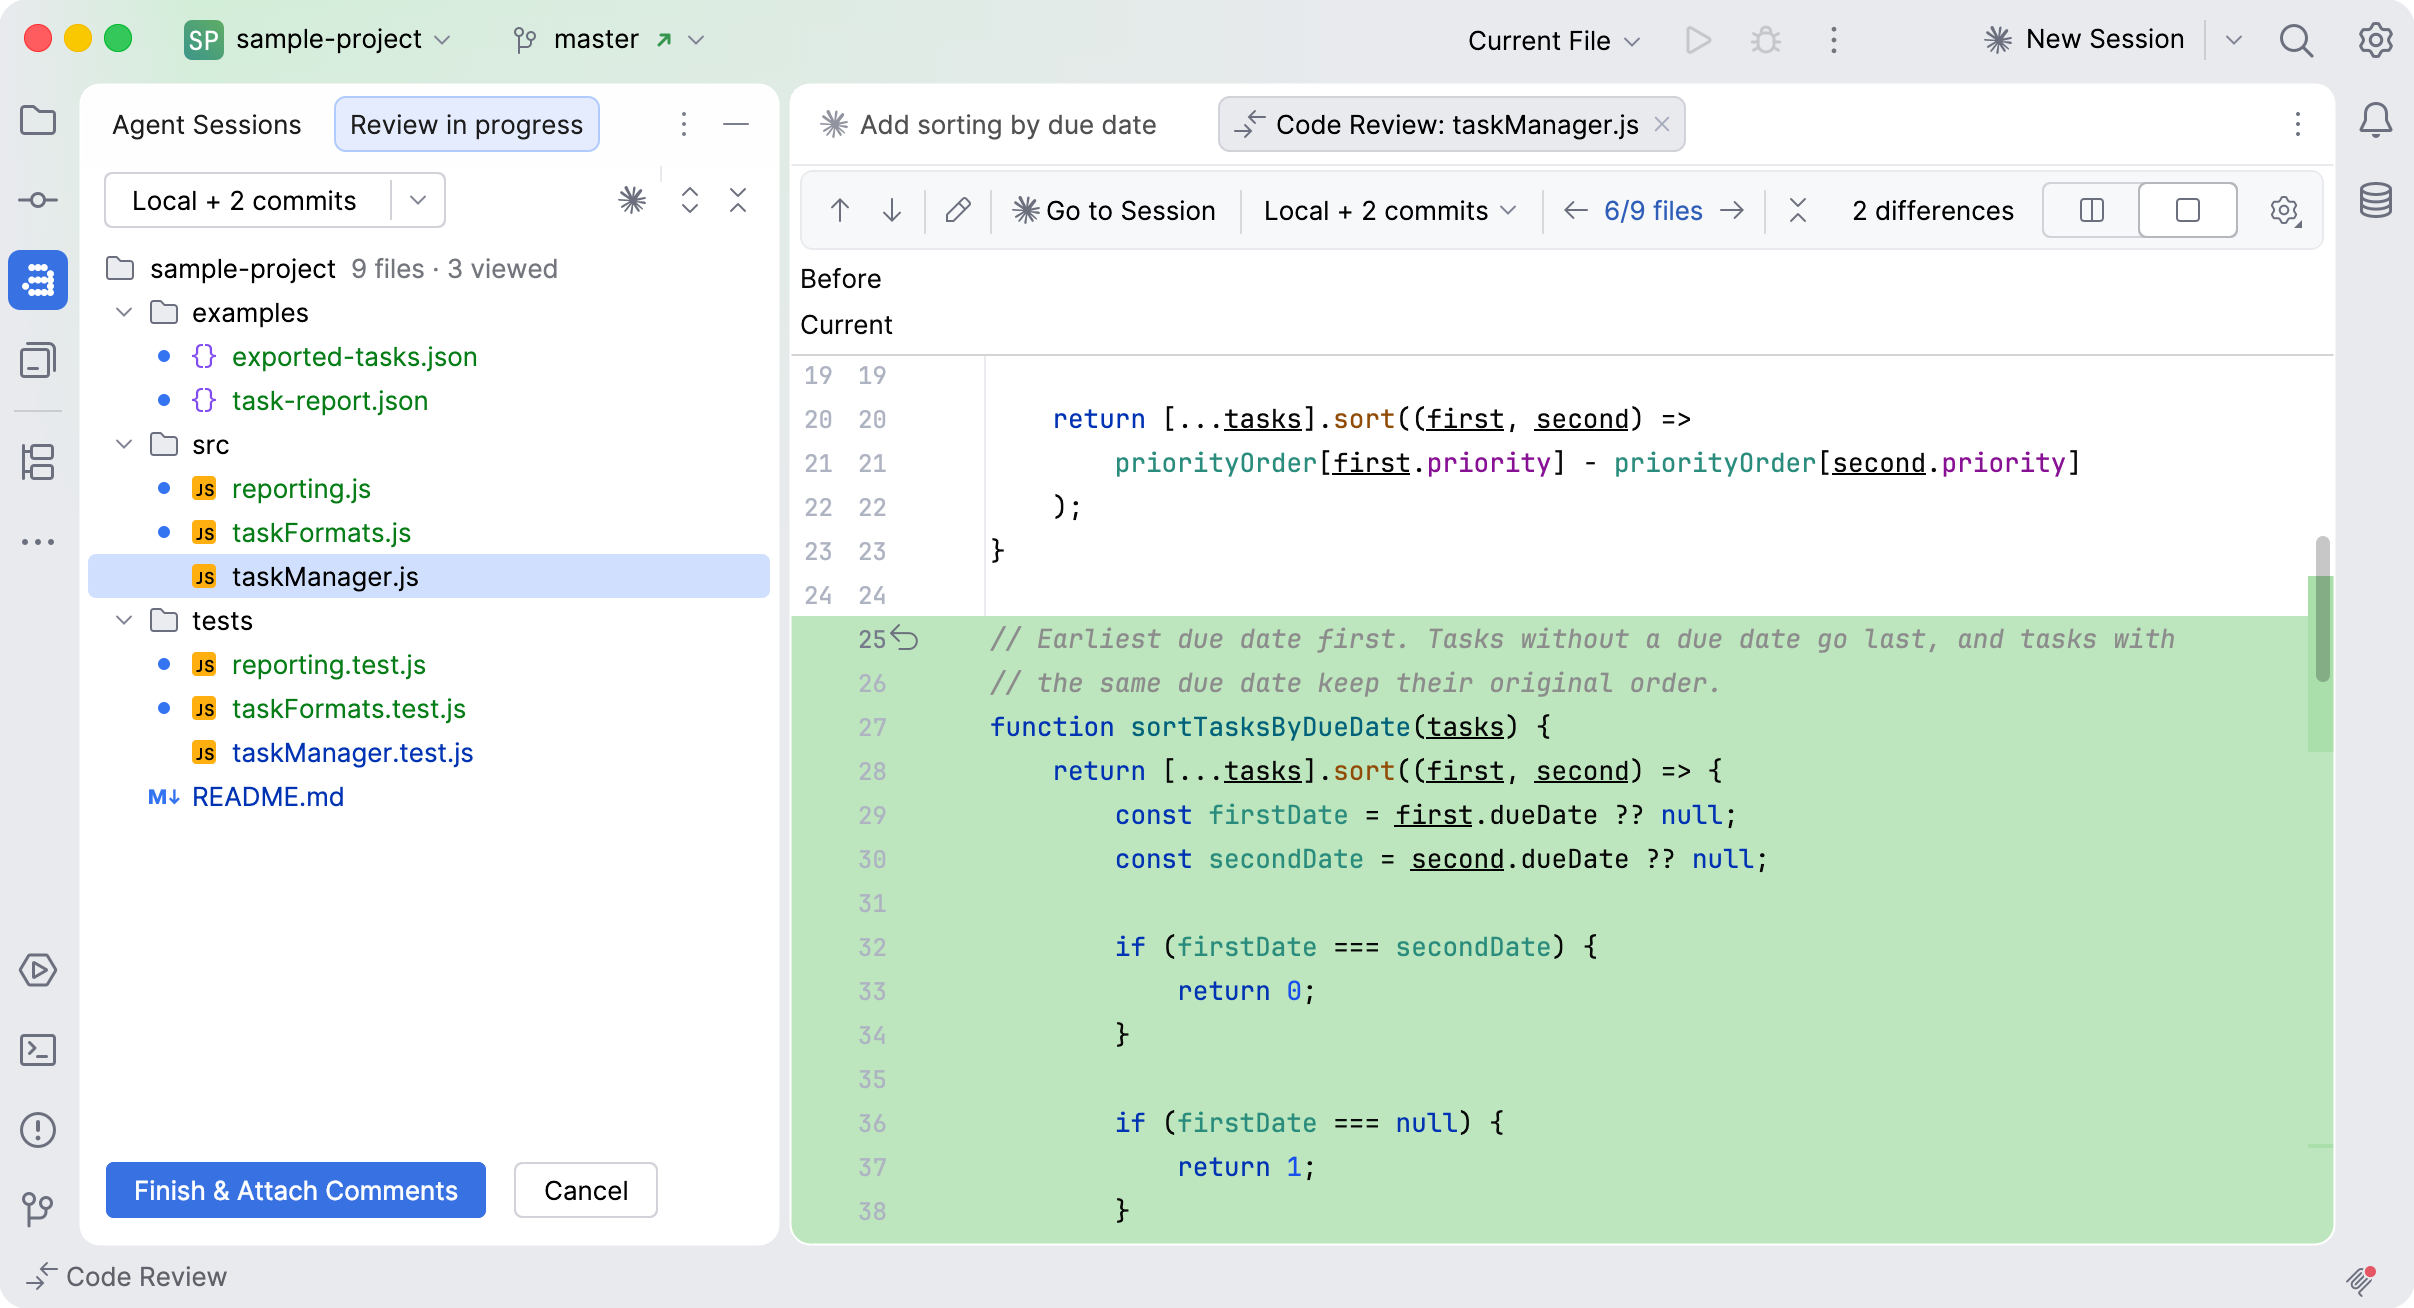
Go through the changed files: select a file in the list on the Review in progress tab, or use the

 buttons on the toolbar of the Code Review tab in the editor.
To add a note, click
 in the gutter next to a line, or select several lines first. Type the note and press Enter.
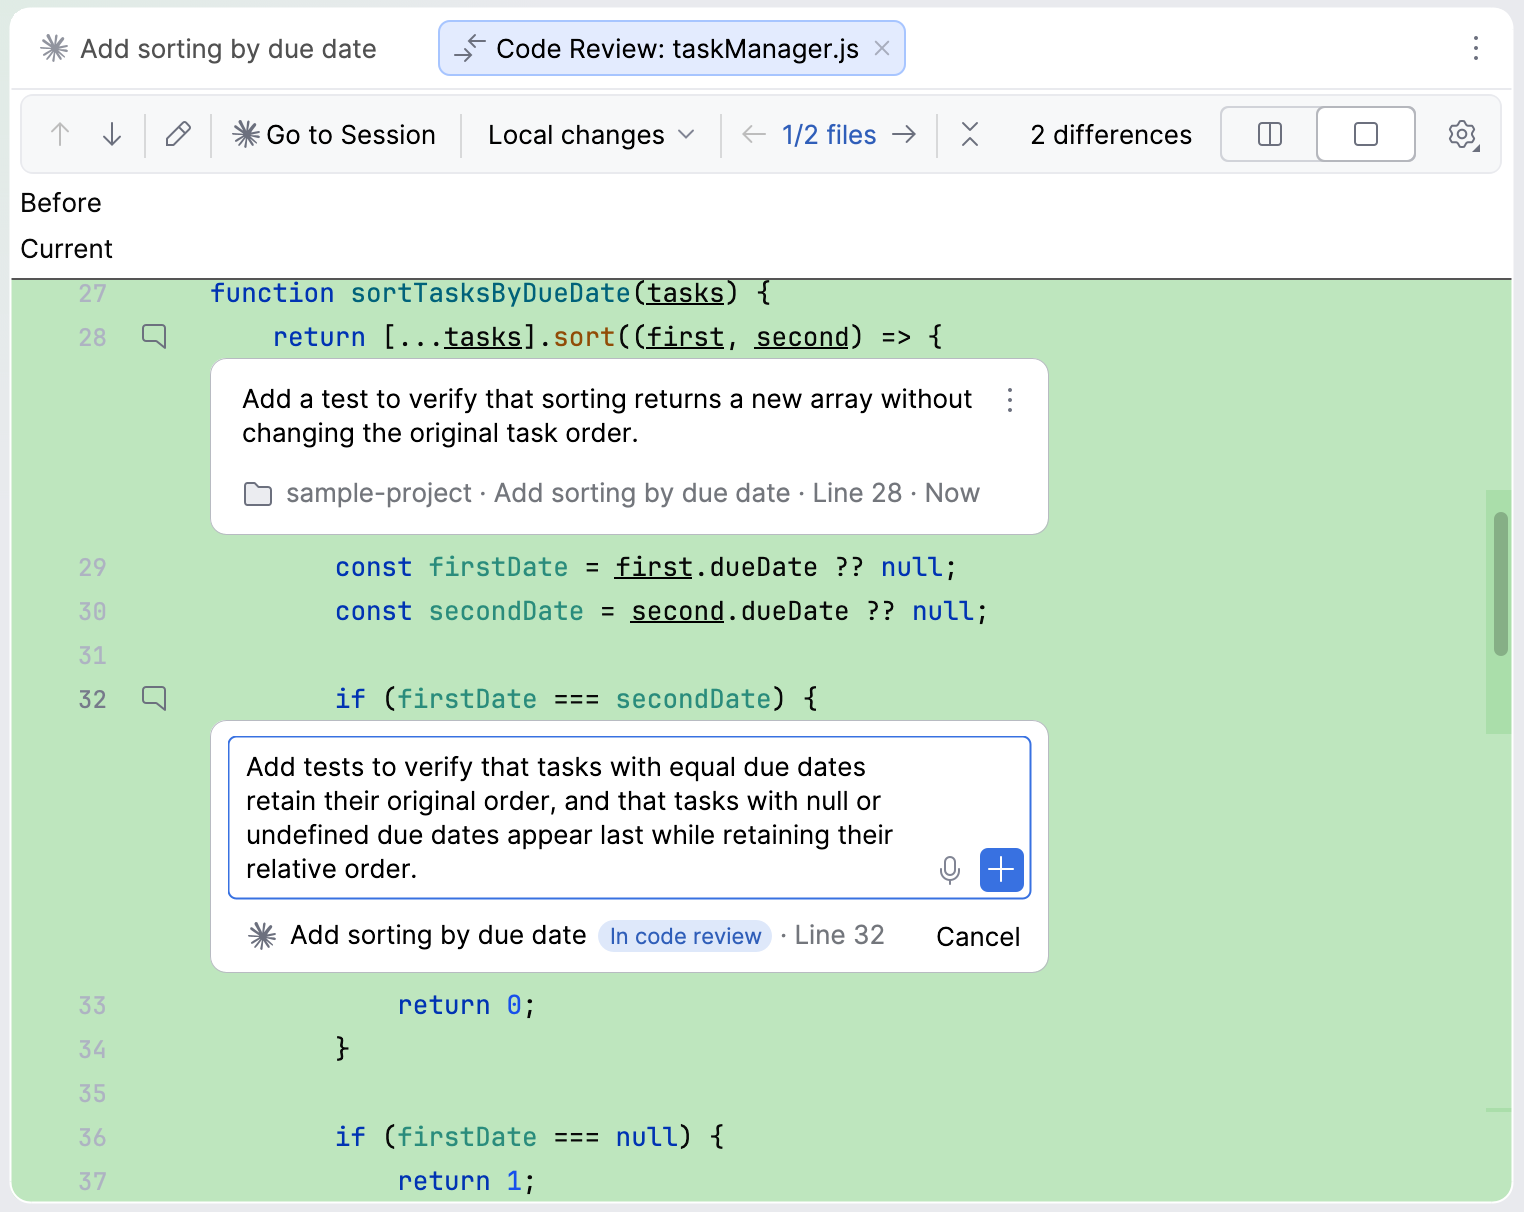
Attach the notes to the session in one of the following ways:
Click Finish & Attach Comments in the Review in progress tab. Air in IDEs ends the review and attaches the notes to the session that you started it from.
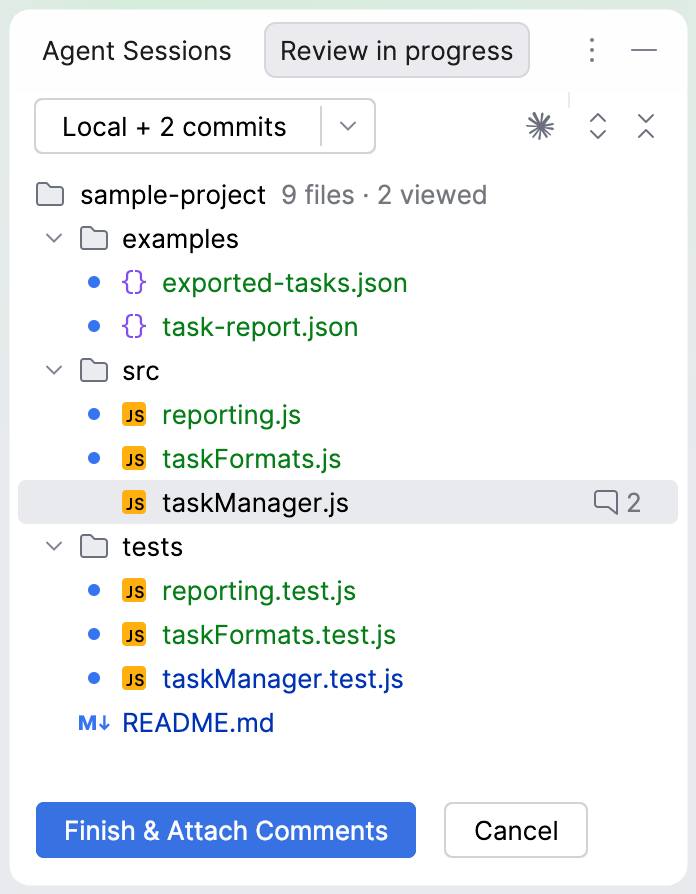
Click Go to Session on the toolbar of the Code Review tab. Then click the Pending Notes button above the text field, select Attach All to the Session, and confirm by clicking Attach Notes.
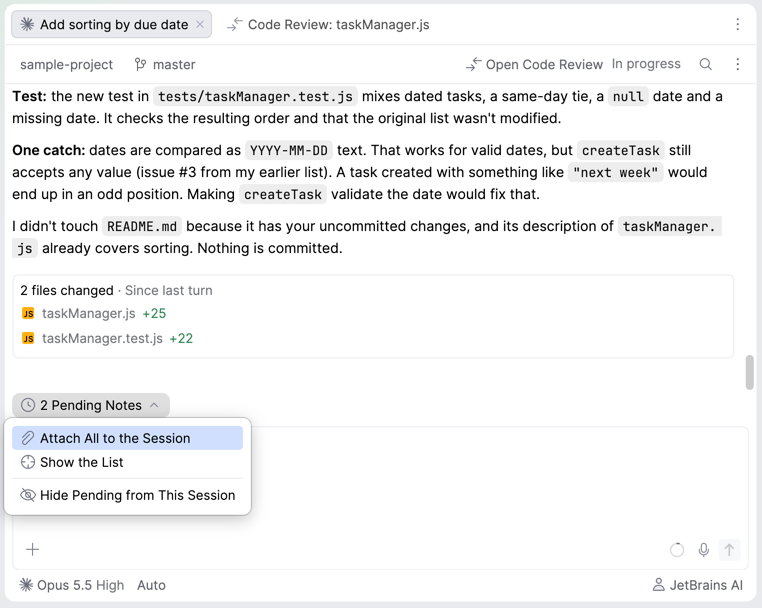
As a result, notes attached to the session appear in the text field as attachments to the files.
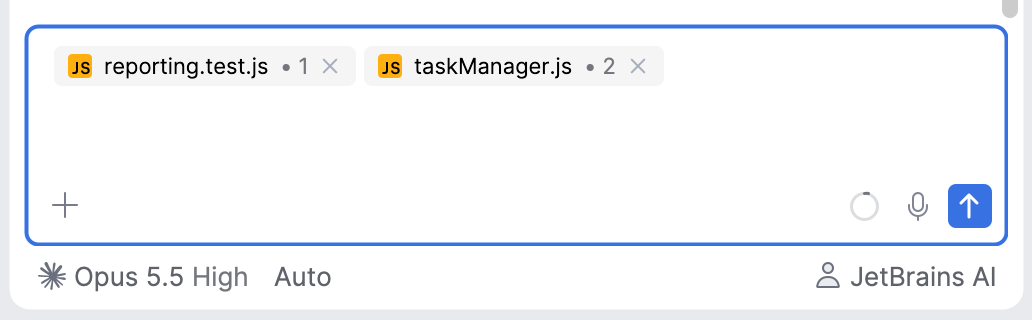
Add a prompt if needed, and send the message. The agent answers your notes or updates the code.
When the changes suit you, commit and push them.
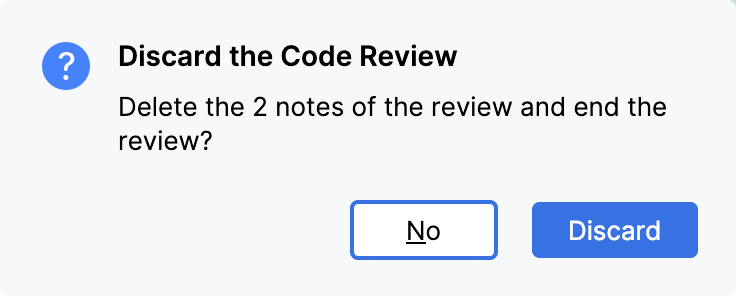
To end the review without sending the notes to the agent, click Cancel in the Review in progress tab. If the review has notes, Air in IDEs asks you to confirm: click Discard to delete the notes and end the review, or No to continue the review.
Add notes outside a code review
You can also add notes to files outside a code review. By default, this feature is disabled, but you can enable it in one of the following ways:
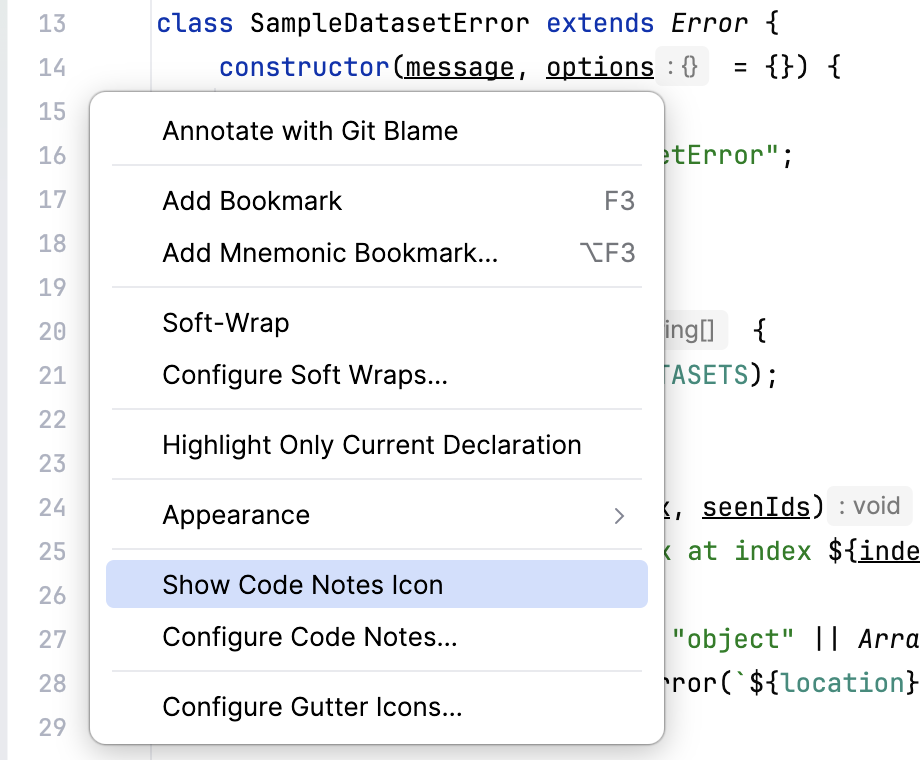
In the file where you want to add notes, right-click in the gutter, and select Show Code Notes Icon.
Press Ctrl+Alt+S, select , and enable Show in source files.
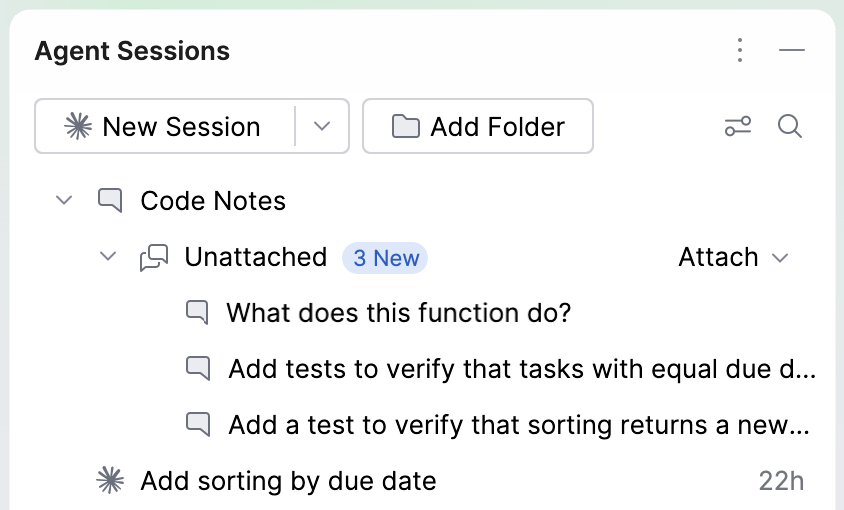
After this, you can leave notes in other files by clicking the icon in the gutter. Such notes can be tracked in the Agent Sessions tool window, under the Code Notes node.
Manage notes
All your notes, both from code reviews and from other files, are listed under the Code Notes node of the Agent Sessions tool window. The notes are grouped by their state:
Unattached: Notes that you added outside a code review and have not attached to a session yet.
Attached: Notes that are attached to the text field of a session and wait to be sent to the agent.
Pending: Notes that you added during the code review that is in progress. They go to the reviewed session when you finish the review.
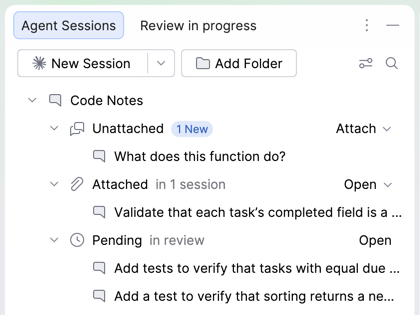
From this list, you can attach notes to a session and detach them from it, navigate to a note or to its session, and edit or remove notes.
Attach notes to a session
To attach all notes to a session, click
 Attach, and then select the required session.
To attach a single note, right-click it in the list, select Attach to Session, and then select the required session.
Detach notes from a session
To detach all notes from a session, right-click the
 Attached group and select Detach from Session.
To detach a single note, right-click it in the list and select Detach from Session.
Navigate to notes
To navigate to a note, right-click it in the list and select Go to Note, or select it and press F4.
To navigate to the session that a note is attached to, right-click the note in the list and select Go to Session.
Edit or remove notes
To edit a note, right-click it in the list and select Edit Note.
To remove a note, right-click it in the list and select Remove.
Review the notes added outside the review scope
Notes that you add to files outside the scope of a code review, for example to a related file that the agent did not change, are listed separately. To review them, do either of the following:
If a code review is in progress, open the Review in progress tab of the Agent Sessions tool window. The files with such notes are listed in the Outside of scope section, and their notes go to the reviewed session together with the others.
If no code review is in progress, expand the Unattached group under the Code Notes node of the Agent Sessions tool window.
Generate a commit message
When your changes are ready, an agent can write the commit message for you. The agent describes only the changes that you include in the commit and follows the commit conventions of the repository. If the project has an AGENTS.md file, the agent also follows the instructions in it, for example a required message format.
In the Commit tool window, select the changes that you want to commit.
Click
 Generate Commit Message above the commit message field.
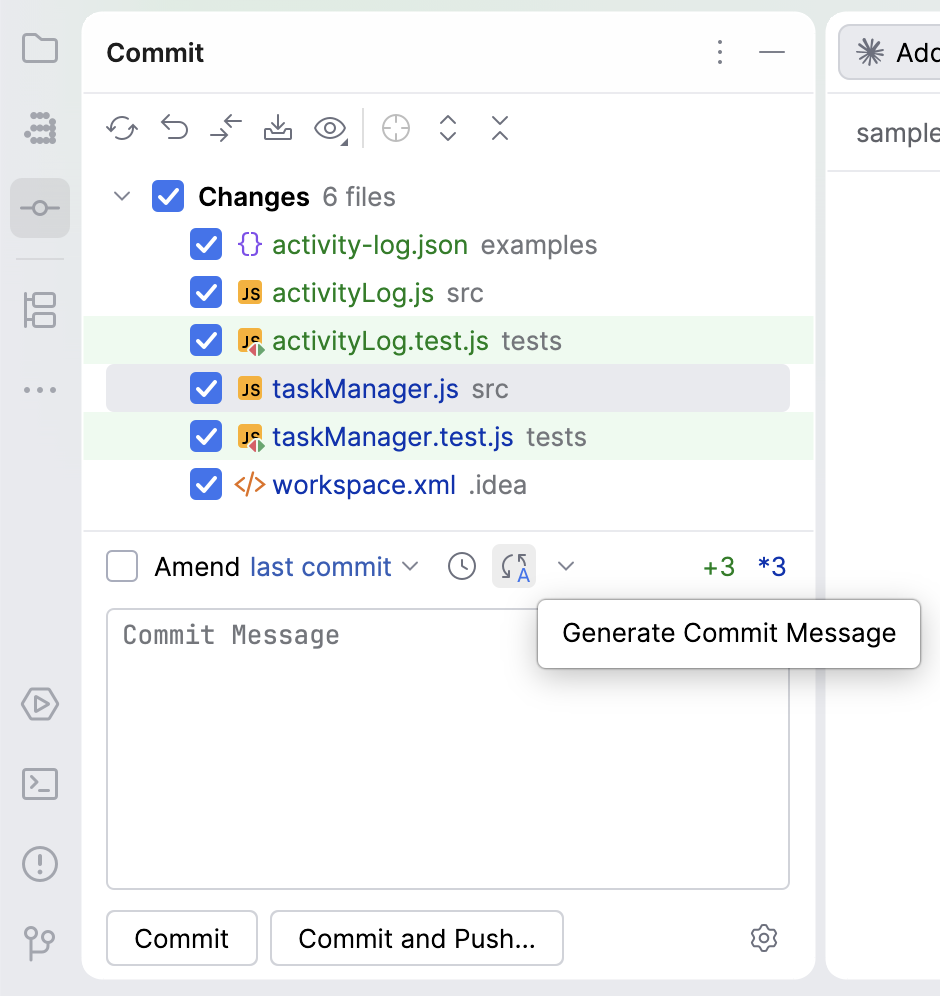
To stop the generation, click
 Stop Generating Commit Message.
Review the message that the agent added to the commit message field, edit it if needed, and commit the changes.
The agent works in a separate background session until the message is ready. Such sessions are hidden from the Agent Sessions tool window. To list them, select Show Service Sessions in Filter and View Options.
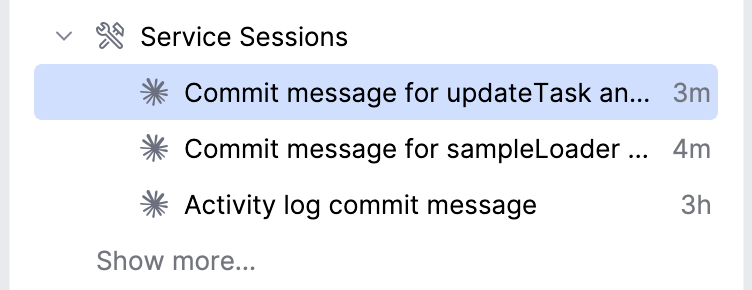
Choose the agent that writes the message
By default, Air in IDEs selects an available agent with a lightweight model and low effort, such as Junie with the Lite model, so the message is ready quickly and costs little. To use a specific agent instead:
Click
Commit Message Agent Settings next to the Generate Commit Message button.In the Commit message agent popup, turn off Auto.

Select the agent, the model, and the effort. If needed, also select the operation mode and the authorization source of the session that generates the message.
Air in IDEs uses your selection for all later commit messages until you change it or turn Auto on again.
Add your own instructions
To get messages in the format that you prefer, add your own instructions to the prompt that Air in IDEs sends to the agent.
Press Ctrl+Alt+S and select .
Enter your instructions in the Prompt for generation field. To refer to the current branch, for example to add the ticket ID from the branch name to the message, click Insert $GIT_BRANCH_NAME.
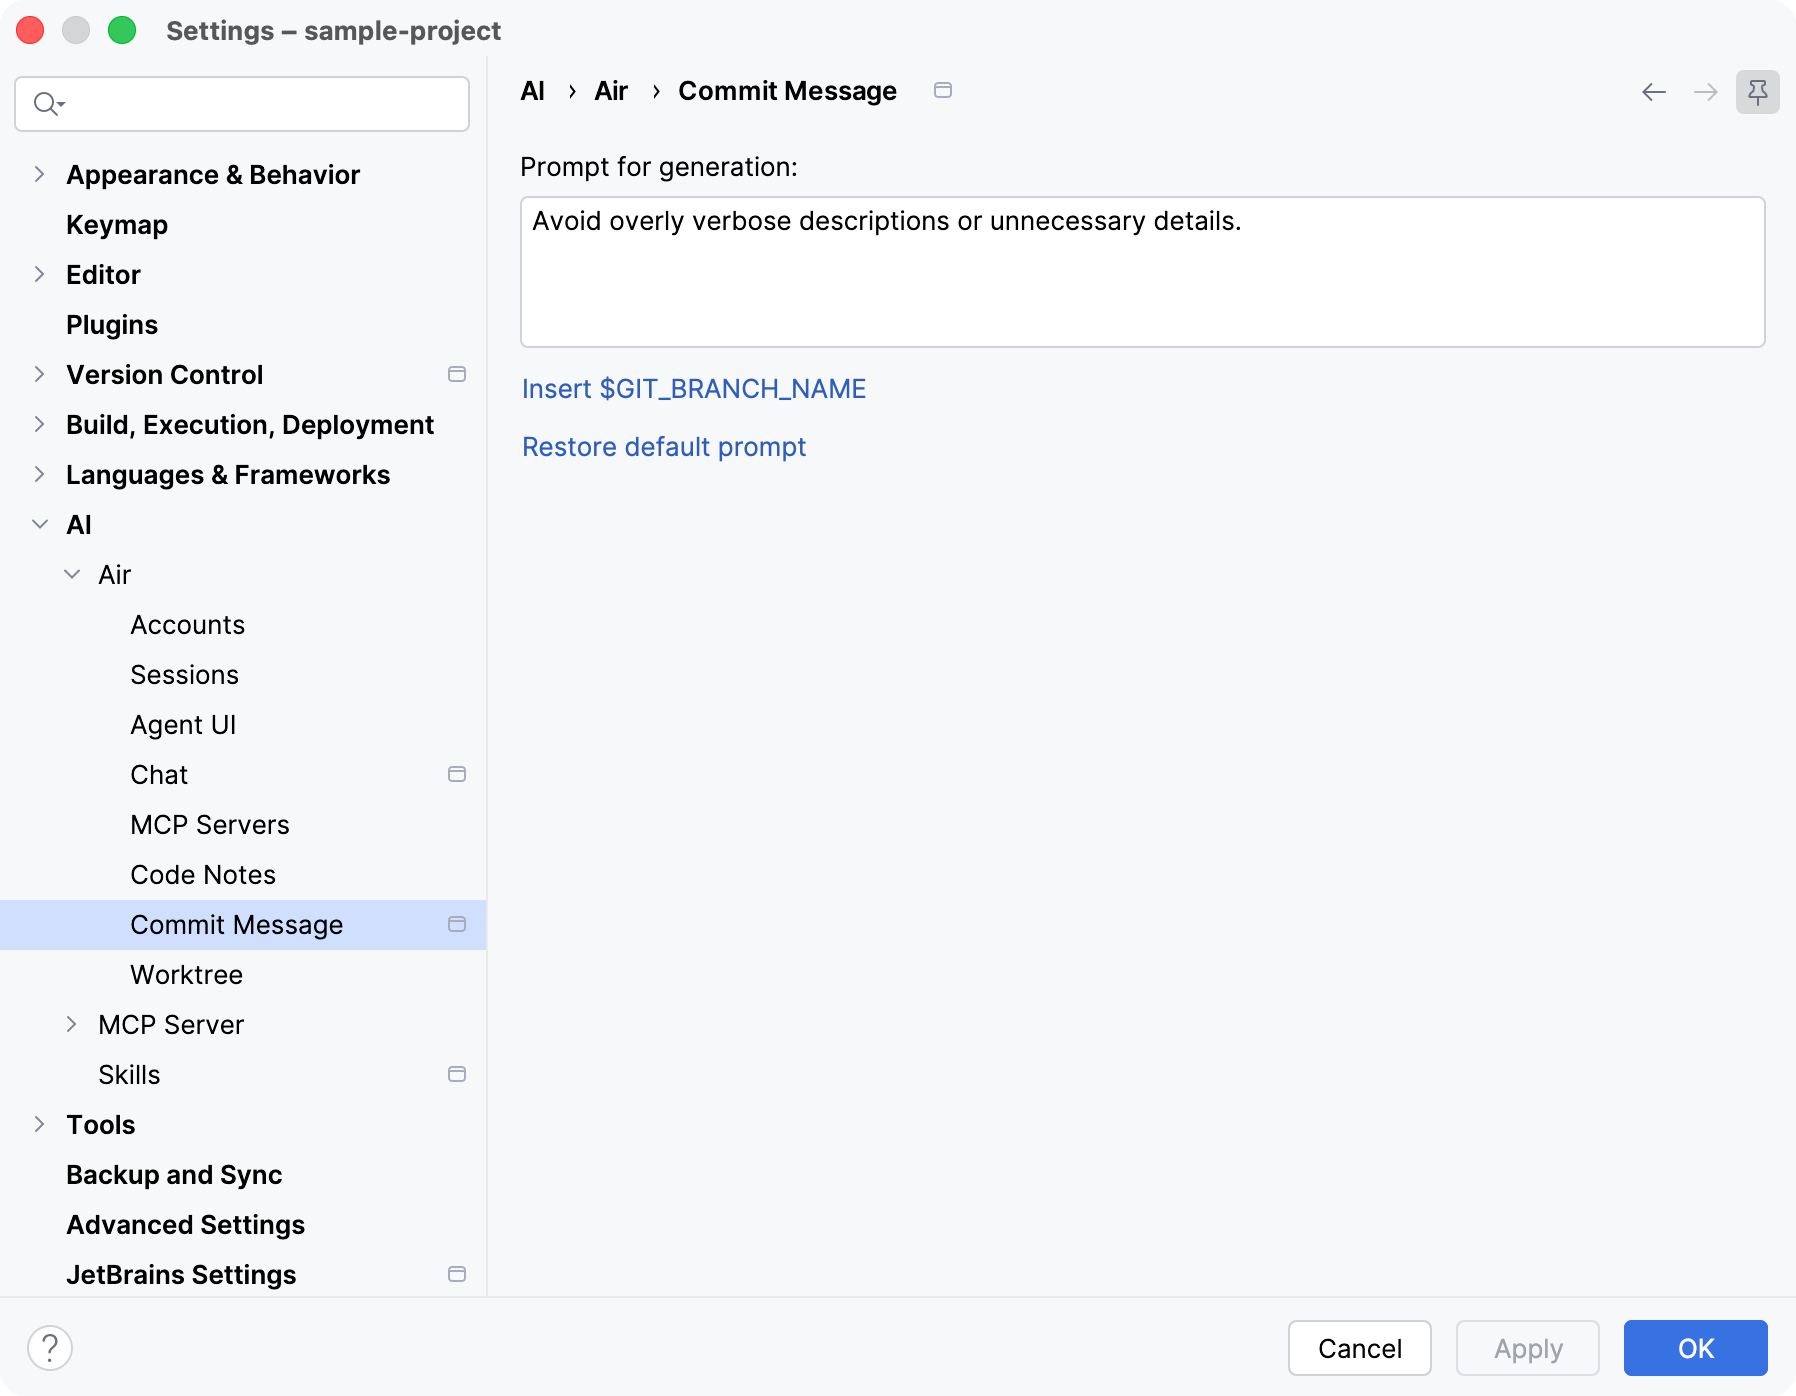
Click OK to save the settings.
To discard your instructions, click Restore default prompt.
Resolve merge conflicts with an agent
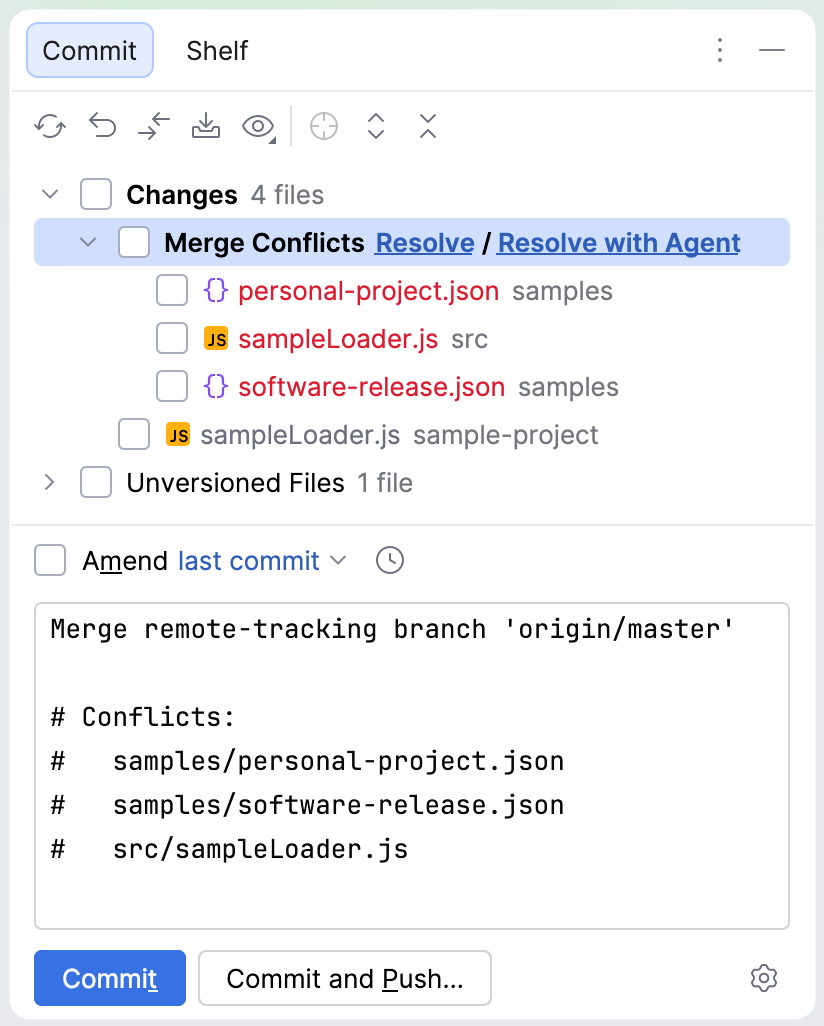
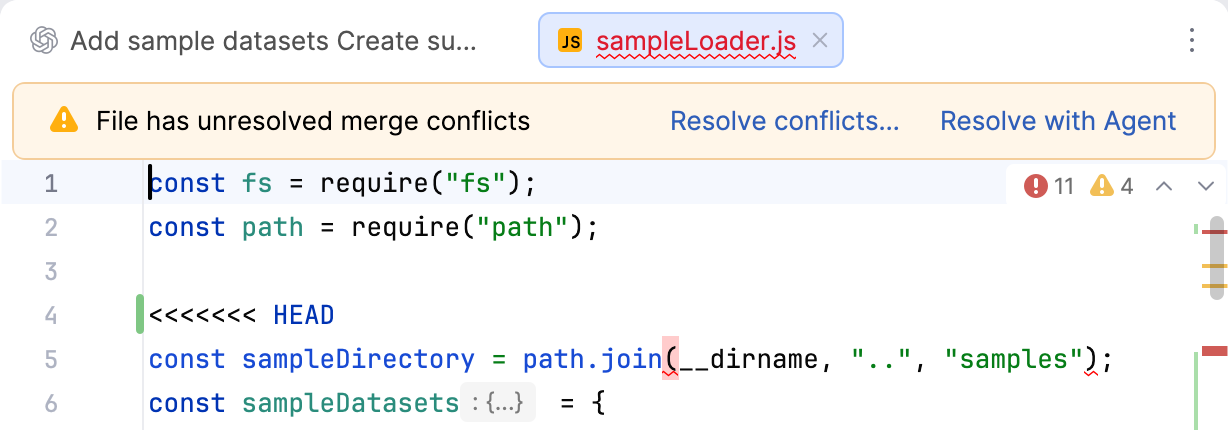
When a version control operation leaves conflicts in your working copy, you can use an agent to resolve them. Click Resolve with Agent in any of the following places:
The dialog that reports the conflicting files after an update or a merge.
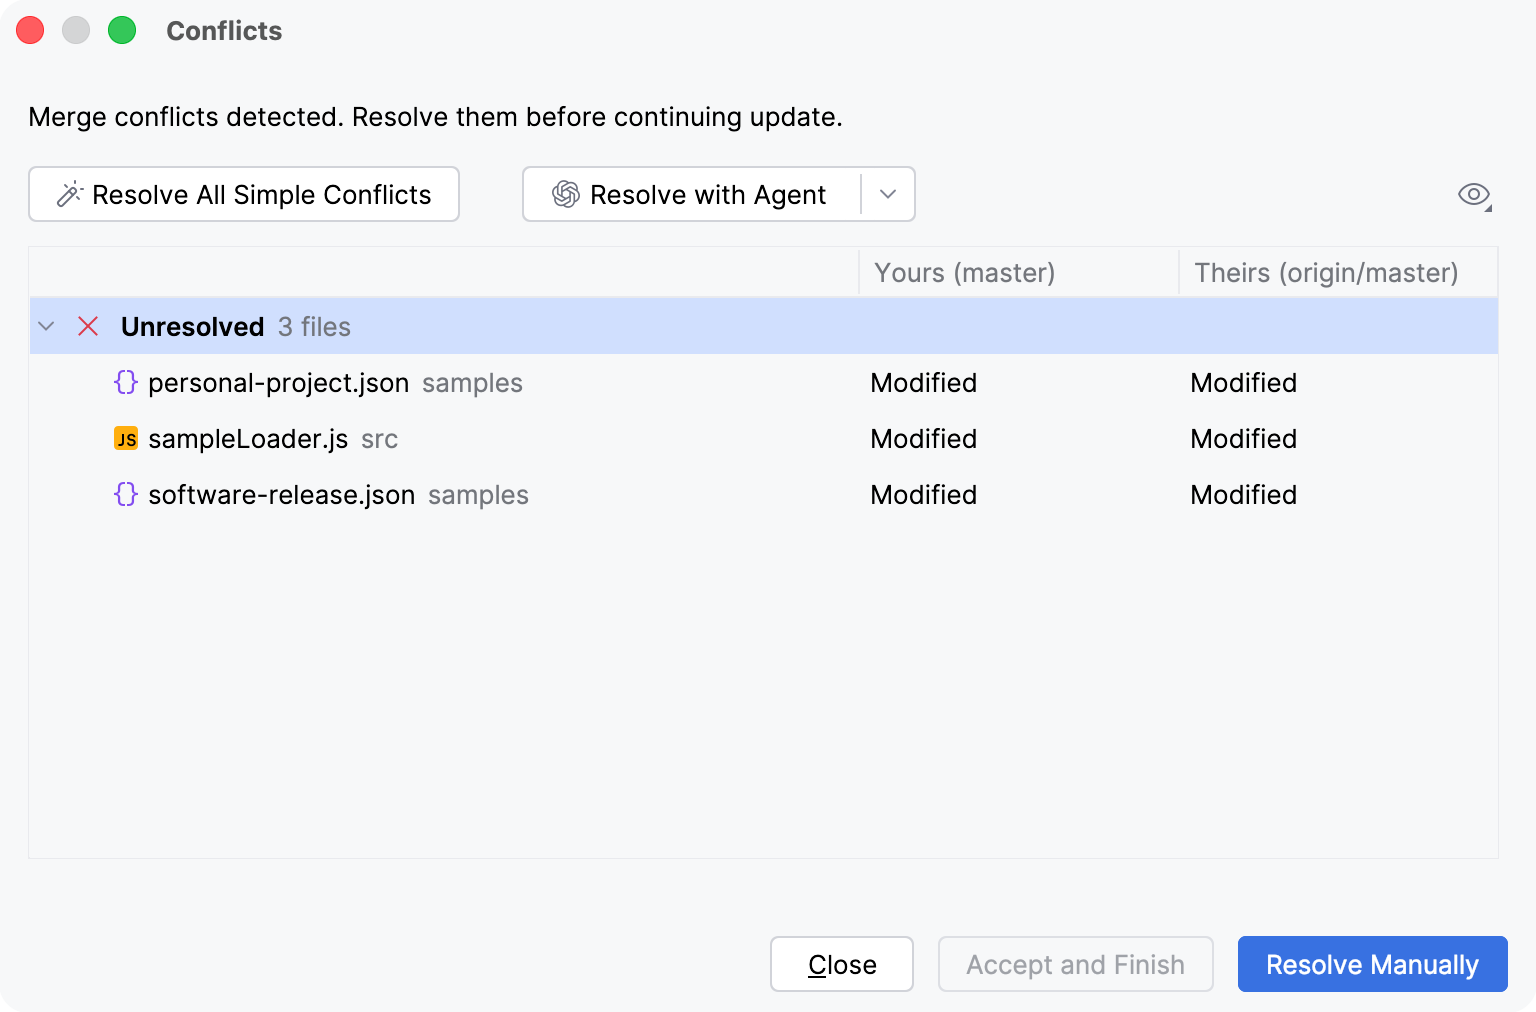
The Merge Conflicts group in the Commit tool window.
The banner in a conflicted file that you opened in the editor.
Air in IDEs starts a new session scoped to the conflicting files, so the agent focuses on the conflict instead of the rest of the project. Review the result as you review any other merge before you commit it.